
When I made the decision to do a girly, lacy, pink nursery for Julianne; I knew I could do it on a budget. I love crafting, sewing, and shopping for things at discounted prices. I had a lot of fun picking projects to do and then watching as things came together piece by piece. You can see the finished product here. I'm going to give you the links to the tutorials I used to accomplish these projects so you can make them too!
I had pinned several tutorials but these are the ones I found most accurate and helpful!
1.) Tissue Paper Pom Poms- This was one of the best tutorials I found on how to make these pretty pom poms. I first planned to make the knit pom poms but quickly decided the knit ones were more of a budget buster! Seriously, one called for 9 yards of knit. When I priced that it would have been over $50 on JUST the fabric. Then they were calling for paper lanterns underneath which added another 10-15 dollars!-- No thanks! These tissue paper ones worked just beautifully and cost $1-2 per pack of tissue paper depending on size and where I found it. My tissue paper was found at Target and Walmart. I had to go back a few times because I kept deciding I wanted more pom poms and because I kept buying all the hot pink, light pink, and cream tissue paper they had in stock. Plan to use one pack per pom pom for the large. I could stretch smaller pom poms to two per pack. For small pom poms 8 sheets of tissue paper worked fine. For large ones I really prefer to use 12 sheets so they look much fuller and prettier!
Here's a great tutorial for how to make them!
http://diyordont.blogspot.com/2011/05/tutorial-tissue-paper-pom-poms.html
(Photo from diyordont.blogspot.com- link above)

These are how mine turned out! I curved my edges when I cut them and loved that look the best. I have 8 hanging total. 4 above crib and 4 above glider. Total cost- $8.

2.) Wall gallery above changing table. For these I used Dollar Tree frames in sizes ranging from 4X6, 5X7, to 8X10. This was honestly my least enjoyable project for the simple fact that painting the glossy frames with acrylic paint was so annoying! It took honestly 4-5 coats on most of the frames to get them covered. Once the frames were painted and dry I got out my scrapbook stack to pick which paper I wanted to use in each. The stack I bought was $10 because I bought it when they were 50% off at JoAnns. I already had the stack, as I had used it last spring for my sister's baby shower. Well worth the money as I've used it for so many projects since then! I simply cut a bird shape for one of the frames, painted small wooden letters I had in my craft bin for the LOVE sign, made a rosette for one, framed two ultrasound pictures for the bottom ones, and used lyrics from a favorite song saying, "And she'll be my little bird, and she'll fly... she'll fly." Total cost- $6.
3.) Canvas initials- I used left over fabric from Julianne's quilt to cover canvases I already had at home. When I find them in a double pack I usually snatch them up. So I had the large one in the middle already. The two smaller ones were old bathroom art that I no longer enjoyed. So I decided to put them to better use! (so because I had the canvases I only had to pay for the letters for this project). If you need to purchase your frames wait until they are 50% off at Ac Moore, Michaels, JoAnns, or Hobby Lobby. Chances are they will be on sale at one of those stores very soon. The letters were $2 at JoAnns and I painted them with acrylic paint like I used for the frames. Total cost- $6.

4.) Scrapbook paper banner- I LOVE banners and enjoy making them for bedrooms, parties, and even just seasonal decorating. They add fun details and give depth to a maybe plain space for almost no cost! Fabric banners look great but they cost more and took more time than I wanted to spend, so I used scrapbook paper from my beloved stack I used for the frames above. I used lace to hot glue the triangles together so that was my only cost in this project. I spent $20 on lace and used it for the banner and the below project on the crib skirt. So we'll split that between the two. Total cost-$10.
Here's the tutorial I used for this project.
http://projectnursery.com/2012/05/diy-no-sew-bunting-flags/


5.) Lace embellishment on crib skirt. I used Oliver's crib skirt and changed it up a bit for Julianne. His crib skirt was a Tea Collection crib skirt. I found it at a consignment sale for $8; while I was pregnant with him. I simply pinned and ironed the lace before making a quick stitch to secure it in place. This project was fast and easy! Less than 30 minutes! Total cost- $10.

6.) Cotton Blossom Wall Applique- this would have added more cost to our nursery but I find it well worth it. We didn't have to paint the room. I had planned on it but once I picked the fabric I actually loved the contrast with the neutral wall. So that saved a lot of time and money! I purchased a coupon for half price to Zulily. (If you aren't on zulily, you need to join it! Great for kids apparel and other mama must haves!) Anyway, with my coupon I was able to get a large wall applique that would have cost over $50 for only $10!! If you have priced them at Target you find they ask $25 per applique and they are much, much smaller. Total cost- $10.


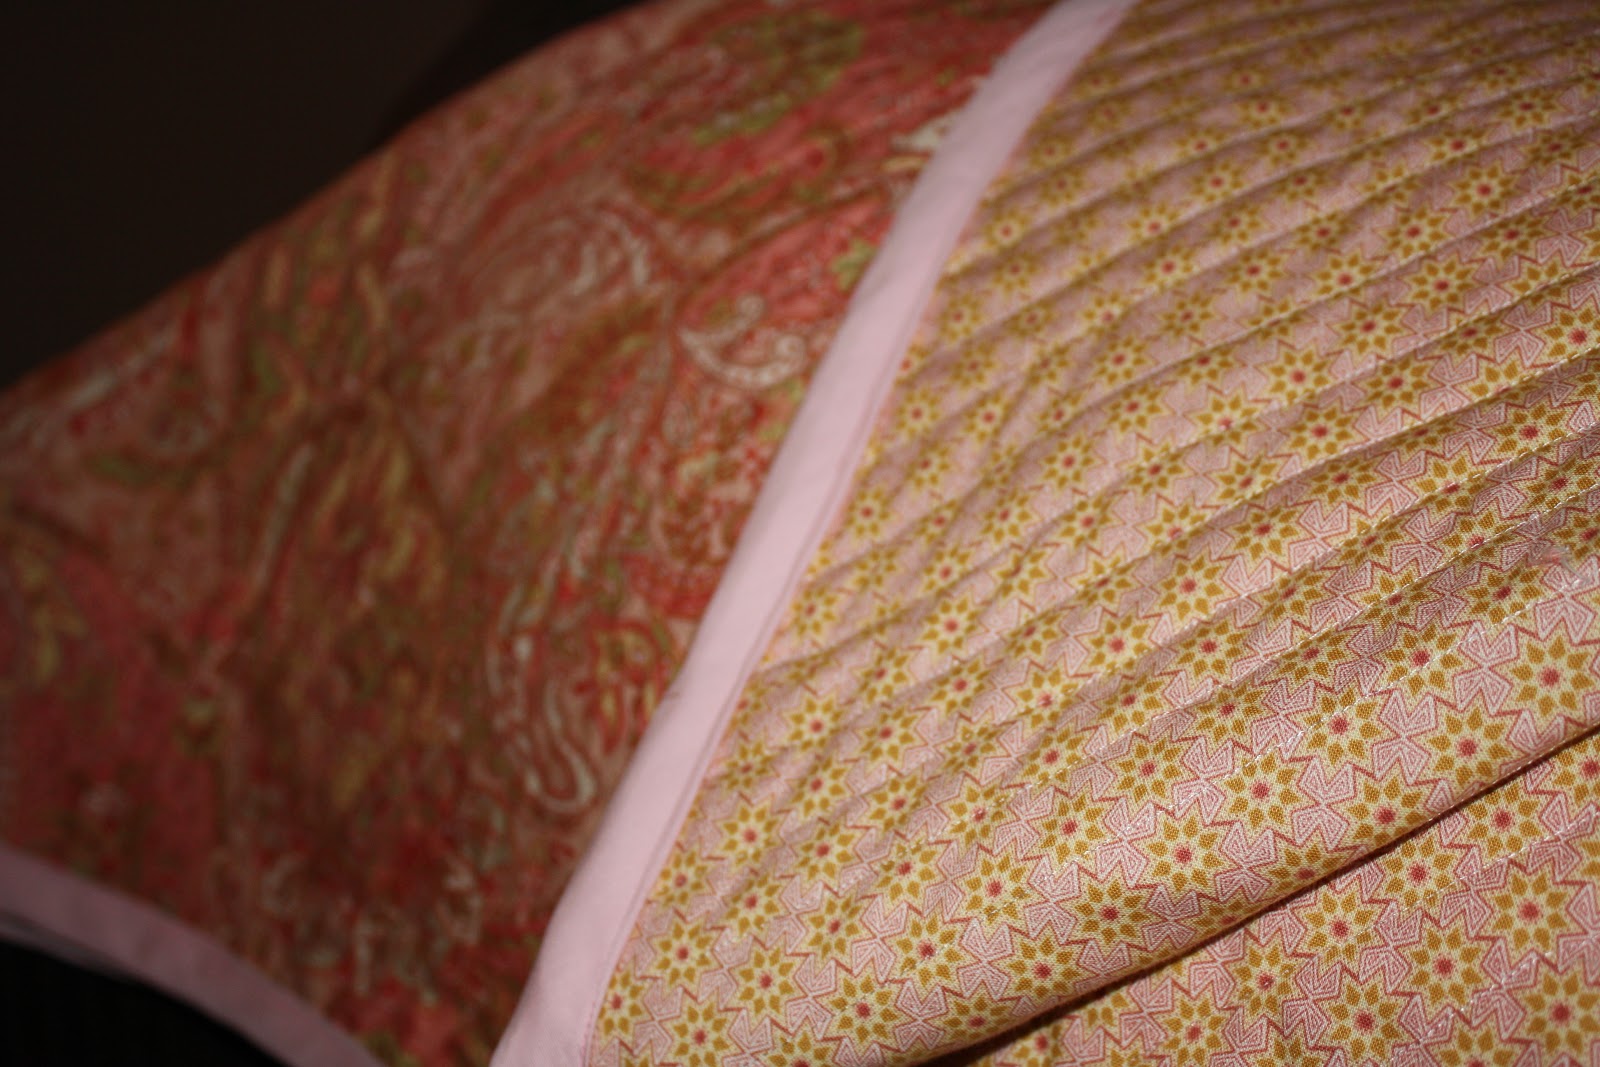
7.) Baby Quilt for Crib- I love the quilt I made for Julianne. It was my first project in the nursery. I went to JoAnns with a stack of coupons and some ideas in mind for colors and searched until I found something I loved. I ended up with a paisley fabric for the front and a smaller printed back fabric. They were both from the Quilter's Showcase collection and were on sale that week, I believe one was 50% off and the other was 30% off. I also picked organic cotton batting for the inside and light pink bias tape for the edging. I purchased 2 yards of each fabric and I'm SO glad I did! It turned out to be enough for all my projects (quilt, minky quilt, throw pillow, and canvases!). I also purchased the pillow form for the throw pillow. I used a combination of two tutorials to make the crib quilt. My quilt is most like the top link, however I did not try to make chenille for the back. My fabrics were solid prints w/ batting inside. I loved the way her quilt looked with the 1 inch quilting though so I mimicked that with my quilt. Total cost- $54.
The two tutorials are found here-
http://www.aestheticnest.com/2010/08/sewing-heirloom-cut-chenille-baby.html
http://prudentbaby.com/2010/09/baby-kid/beginners-baby-blanket-3-2/#.URkDTqX0VSU


8.) Throw pillow- I found this tutorial to be so simple and easy to follow. I used scraps of each of my quilt fabric and finished off the rest of the lace I had purchased as the front detail. (the cost of the fabric, pillow form, and lace are all included in totals found above)
http://www.theribbonretreat.com/blog/how-to-make-a-throw-pillow.html

9.) Hairbow Holder- Now this was a gift. A dear friend who hosted my baby shower made it for me. I believe this is the tutorial she used at least as a guide for how to do it. I am unsure of cost since it was a gift.
http://www.theparopost.com/2011/10/diy-bow-holder.html

10.) Ivory Ruffle Curtains- The curtains came from amazon.com and we were able to use amazon points we had acquired over the past few months. We purchased two panels and because of our points only paid a couple dollars. Total cost- $3.50.
http://www.amazon.com/The_Curtain_Shop-Gypsy-Ruffled-Panel-Cream/dp/B00851A2R2/ref=pd_sim_hg_3

TOTAL COST- $107.50
My nursery reveal post was a little off in my budget estimate. This is a more accurate number. As you've probably figured out, we already had the furniture already from Oliver's nursery. But there is so much more to a nursery than furniture! And many people end up breaking bank on bedding and other decor. The furniture itself came from Target, amazon.com, and craigslist. My advice would be to check craigslist for some great deals!
I am very pleased with the way the nursery turned out and my husband is pleased with the low cost of it!! I hope this was helpful if you are looking to decorate a nursery of your own! Thanks for stopping by!
xoxo,
Marissa


